Aim:
To identify calving cows quicker, intervene sooner, have more live calves, fewer dead/rotten calvings and damaged cows.
What are the different stages of calving and when do I intervene?
Stage 1:
This involves uterine contractions but no abdominal contractions – to push the calf into the correct position and dilate the cervix.
The cow shows outward signs of isolating herself from the herd, arching her back, lifting her tail, showing some discomfort and getting up and down.
If this stage persists for more than 8 hours you should examine her.
Stage 2: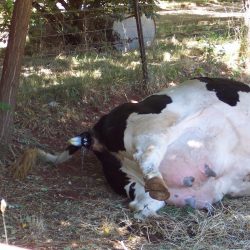
This stage begins after the water bag has broken.
The cow starts to strain- the uterine contractions are aided by the abdominal contractions and the calf is delivered.
If this stage persists for more than 2 hours with no calf delivered OR there is no visible progress every half an hour she should be examined.
Also intervene when:
- There is an abnormal presentation. (The normal presentation is two front feet followed by a nose).
- The head or tongue of the calf is swollen.
- The calf has meconium staining (yellow or green staining), which indicates it is stressed.
- The calf doesn’t freely move in and out with every push, suggesting the calf is jammed in the pelvis.
- The legs of the calf are crossed over or the underside (palms) of the hooves are facing each other- this indicates the calf is too big for the pelvis.
How to examine a calving cow
- Ensure she is adequately restrained in a crush or tied to a solid object by a halter.
- Cleanliness is next to Godliness! Wash your hands and arms well in clean soapy water and clean the vulva before performing a vaginal exam.
- Use plenty of clean lube!
Is the cervix open?
Sometimes the cervix feels closed but it is actually a twisted uterus- beware, if a cow continues to be uncomfortable or strain and the cervix doesn’t open the uterus could be twisted and you should call the vet, the sooner the better! If twisted it usually feels like a firm ridge when examining the cow. Or run your hand along the vaginal wall towards the cervix – if this twists rather than running straight to the cervix then the uterus is twisted.
Front leg or back leg?
- If the bottom two joints of the leg (the fetlock and the knee) bend in the same direction (form a C shape), then it’s a front leg.
- If they bend in the opposite direction (form a Z shape), then it’s a back leg.
- You cannot rely on the direction the hooves are facing to determine if it’s a front or back leg as the calf may be coming upside-down.
Putting on chains/leg ropes
- Place one loop above the fetlock and one below the dewclaws to even the pull on the calf’s legs.
- Make sure you trace each leg back to the chest of the same calf to avoid pulling on one leg of each twin.
To pull or not to pull? – is the calf too big?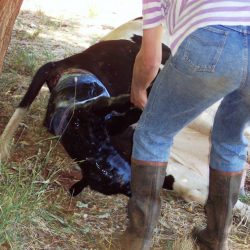
General rule of thumb:
- Can you get your hand comfortably around the calf’s head?
- If a calf can’t be pulled with the force of 2 men (one on each leg) then it shouldn’t be pulled- don’t use motorbikes or tractors! Take care with calving jacks.
- If the fetlocks (or hocks in a backwards calf) cannot be pulled a handbreadth from the vulva, the chest (or hips) are too big for the pelvis and the vet should be called.
- Pull on each front leg separately- walking them through the pelvis (keep tension on the other leg) so that the shoulders don’t jam in the pelvis.
- Let the calf rest and catch its breath once the chest is clear of the cow’s vulva before you start pulling again.
- If the hips are getting stuck in the pelvis, push the calf back and try rotating it 90 degrees- this fits the widest part of the hips into the widest part of the cow’s pelvis.
Tips on using a calving jack
- Take up the slack with the jack and then lever down to help pull the calf out-don’t just keep jacking straight.
- Only lever and jack as the cow pushes- rest her and the calf in between.
- If the calf is backwards then jack upwards until the hips are clear of the pelvis.
- Don’t use too much force-> damaged cows and calves.
Most Importantly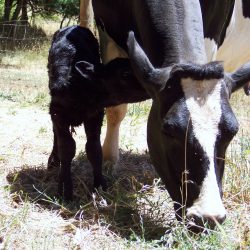
- Check your calving cows regularly.
- Intervene early.
- If in doubt ring the vet.
Calling the vet earlier rather than later is more likely to result in a live cow and calf and probably a smaller vet bill- rotten calvings should be avoided at all costs!